The Singer 2517C Manual is a comprehensive guide designed to help users master their sewing machine. It covers setup, operation, and maintenance, ensuring optimal performance. Available as a free PDF download, it offers detailed instructions and clear diagrams for seamless sewing experiences. Perfect for both beginners and experienced sewists, this manual is essential for unlocking the full potential of the Singer 2517C.
Overview of the Singer 2517C Sewing Machine
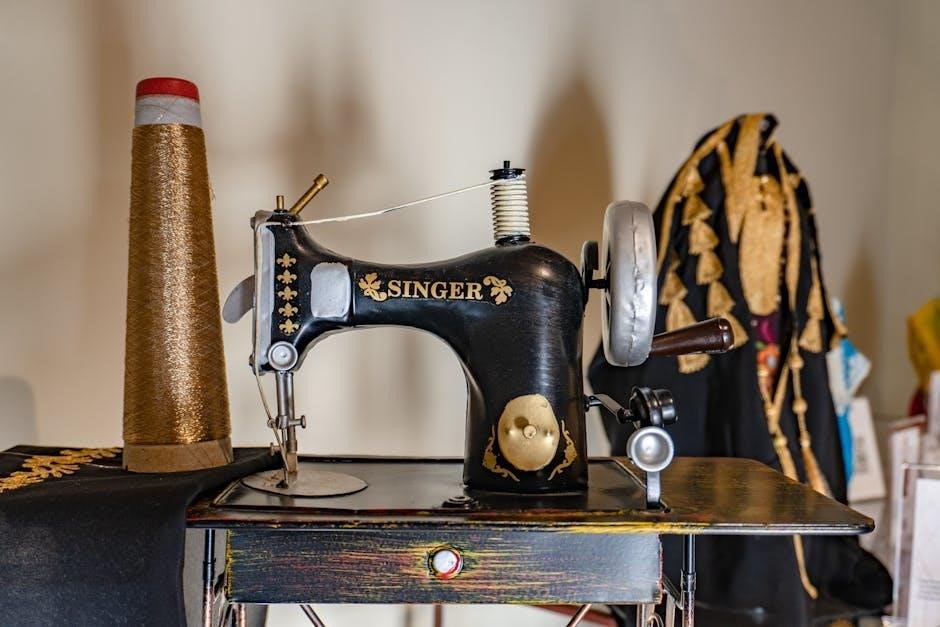
The Singer 2517C Sewing Machine is a versatile and user-friendly device designed for both beginners and experienced sewists. It offers a range of automatic features, customizable stitch options, and a durable build quality. The machine is ideal for various sewing projects, from basic repairs to intricate designs. With its free-arm capability and compatible presser feet, it caters to quilting, embroidery, and specialized sewing tasks. The Singer 2517C is a reliable choice for creative and heavy-duty sewing needs.
Importance of the Manual for Users
The Singer 2517C manual is essential for users to maximize the machine’s potential and ensure proper operation. It provides detailed guidance on setup, threading, and troubleshooting, helping users avoid common mistakes. The manual also explains advanced features and maintenance tips, enabling users to customize their sewing experience. Whether you’re a novice or an experienced sewist, the manual serves as a comprehensive reference to unlock the machine’s full capabilities and enhance productivity.
Where to Download the Singer 2517C Manual
The Singer 2517C manual can be downloaded from the official Singer website or trusted sources like ManualsLib, ManualsOnline, or eBay. Additionally, sewing forums and communities often share downloadable PDF versions. Ensure you download from reputable sites to avoid malware. Physical copies may also be available on platforms like Etsy or Amazon. Always verify the source for authenticity and safety.

Key Features of the Singer 2517C Sewing Machine
The Singer 2517C is a mechanical sewing machine with an automatic needle threader, 17 built-in stitches, a heavy-duty metal frame, free arm, LED light, and multiple presser feet options.
Automatic Features and Functions
The Singer 2517C features an automatic needle threader, saving time and effort. It also includes automatic tension control, ensuring consistent stitches. With 17 built-in stitches, the machine offers automatic stitch length and width adjustments. These features enhance sewing efficiency and precision, making it ideal for both beginners and experienced sewists. The automatic functions streamline the sewing process, allowing users to focus on creativity and productivity without manual adjustments.
Stitch Options and Customization
The Singer 2517C offers 17 built-in stitches, including straight, zigzag, and decorative options. Users can customize stitch length and width to suit their projects. The machine also features adjustable tension, allowing for precise control over fabric handling. Additionally, the free-arm design enables easy sewing of cuffs and small spaces. These customization options make the 2517C versatile for various sewing tasks, from basic repairs to creative projects;
Design and Build Quality
The Singer 2517C features a durable metal frame, ensuring stability during operation. Its compact design makes it portable and space-efficient. The machine boasts a user-friendly interface with an intuitive control panel. Built with high-quality materials, it offers reliable performance for both beginners and experienced sewists. The sturdy construction and sleek design contribute to its long-lasting durability, making it a practical choice for everyday sewing tasks and creative projects alike.

Setting Up the Singer 2517C Sewing Machine
Unpack carefully, connect to a power supply, and place on a stable surface. Follow manual instructions for initial setup and adjustments to ensure proper functionality.
Unpacking and Initial Setup
Start by carefully unpacking the Singer 2517C sewing machine from its box. Ensure all accessories, such as presser feet, bobbins, and needles, are included. Inspect the machine for any visible damage. Place it on a flat, stable surface, away from direct sunlight. Familiarize yourself with the machine’s components, such as the spool pins, tension dials, and stitch selectors. Follow the manual’s guidance for initial setup to prepare the machine for first use;
Connecting the Machine and Power Supply
Plug the Singer 2517C sewing machine into a nearby power outlet using the provided cord. Ensure the outlet matches the machine’s voltage requirements, typically 120V. Check the power cord for any damage before use. Avoid overloading the outlet with other devices. Once connected, press the power button to test the machine’s operation. Always unplug the machine when not in use or during maintenance to ensure safety.
Understanding the Control Panel
The Singer 2517C’s control panel is designed for easy navigation, featuring stitch selection buttons, a stitch length dial, and a backlit LCD screen. Use the buttons to choose from 17 built-in stitches, including straight, zigzag, and decorative options. The dial adjusts stitch length and width. The LCD displays the selected stitch and settings, guiding you through operations. Familiarize yourself with these elements to optimize your sewing experience and access advanced features seamlessly.

Threading and Bobbin Setup
Proper threading and bobbin setup are essential for smooth sewing. Follow the manual’s step-by-step guide to thread the machine correctly, ensuring the bobbin is securely installed and aligned. Always check tension settings for consistent stitch quality and to prevent thread jams or uneven fabric feeding during your sewing projects.
Step-by-Step Guide to Threading the Machine
To thread the Singer 2517C, start by placing the spool on the spool pin and pull the thread through the tension discs. Guide the thread through the take-up lever, ensuring it clicks into place. Next, insert the thread into the needle’s eye from front to back. Gently pull the thread to remove any slack and ensure proper tension. Finally, test the thread by sewing a few stitches on scrap fabric to ensure smooth operation and consistent stitch quality.
Installing and Threading the Bobbin
To install the bobbin, lift the needle plate and place the bobbin in the bobbin case. Pull the thread through the tension spring and guide it through the slot on the case. Snap the case into place and gently pull the thread to ensure it’s seated properly. Trim any excess thread close to the bobbin. Finally, bring the bobbin thread up through the fabric by turning the handwheel. This ensures the machine is ready for sewing with balanced tension.
Troubleshooting Common Threading Issues
If the thread doesn’t catch, check the bobbin installation and ensure the take-up lever is in the correct position. If the thread bunches or breaks, verify tension settings and rethread the machine. Remove any loose thread and ensure the needle is properly inserted. Clean the bobbin area to remove lint or debris. If issues persist, consult the Singer 2517C manual for specific troubleshooting steps or adjust the bobbin tension as needed.
Operating the Singer 2517C Sewing Machine
Master basic sewing techniques, select stitch patterns, and customize settings for precise control. Adjust speed and tension for smooth operation, ensuring optimal results for various fabrics and projects.
Basic Sewing Techniques
Start by preparing your fabric and machine. Place the fabric under the needle, align edges, and gently guide it. Use the handwheel to control stitching speed. Begin with a straight stitch, then gradually explore zigzag and decorative options. Always backstitch at the start and end for secure seams. Practice on scrap fabric to perfect your technique and ensure even stitching. This foundational skill is essential for all sewing projects.
Using Different Stitch Patterns
The Singer 2517C offers various stitch patterns for versatility. Select the desired stitch using the control panel, ensuring it matches your fabric type. Adjust stitch length and width as needed for optimal results. Experiment with decorative stitches for embellishments or heavy-duty stitches for thicker materials. Always test a stitch on scrap fabric before sewing your final project to ensure accuracy and prevent errors. This feature enhances creativity and adaptability in your sewing projects.
Adjusting Tension and Speed
Adjusting the tension and speed on the Singer 2517C ensures smooth sewing. Use the tension dials to balance thread flow, avoiding puckering or loose stitches. For speed, use the control slider to set your preferred pace, slowing down for precision or speeding up for straight seams. Proper tension and speed adjustments enhance stitch quality and make sewing more efficient. Always test adjustments on scrap fabric before working on your project.
Maintenance and Troubleshooting
Regular cleaning and lubrication ensure optimal performance. Troubleshoot issues like jammed stitches or uneven tension by consulting the manual. Addressing problems early extends machine life and reliability.
Cleaning and Lubricating the Machine
Regularly clean the Singer 2517C by removing lint and debris with a soft brush or compressed air. Lubricate moving parts every 1-2 months using Singer-approved sewing machine oil. Avoid harsh chemicals, as they can damage the finish. Clean the feed dogs and bobbin area thoroughly to ensure smooth operation. Proper maintenance prevents mechanical issues and extends the machine’s lifespan, keeping it running efficiently for years of reliable service.
Common Issues and Solutions
Common issues with the Singer 2517C include thread bunching, machine not turning on, or uneven stitching. For thread bunching, check threading and tensions. If the machine won’t start, ensure the power cord is secure and the fuse isn’t blown. For uneven stitches, adjust bobbin tension or rethread the machine. Refer to the manual for step-by-step solutions to resolve these issues quickly and maintain smooth operation.
When to Contact a Professional
If you encounter mechanical failures, broken gears, or electrical issues, it’s best to contact a professional. Complex repairs or parts replacement should be handled by authorized Singer technicians to avoid further damage. Additionally, if troubleshooting steps from the manual don’t resolve the issue, seeking expert assistance ensures your machine operates safely and efficiently. Always consult Singer’s customer support for reliable service.

Accessories and Additional Features
The Singer 2517C comes with interchangeable presser feet, zipper, buttonhole, and edge guides, enhancing versatility. Optional attachments like embroidery hoops and quilting extensions expand creative possibilities. The free arm allows easy cuff sewing, while additional accessories like carrying cases and extension tables improve convenience and productivity for various sewing projects.
Compatible Presser Feet and Accessories
The Singer 2517C supports a variety of presser feet, including zipper, buttonhole, and edge guides, to handle diverse sewing tasks. Additional accessories like extension tables, carrying cases, and specialized feet enhance functionality. These tools are designed to optimize performance and adapt to different sewing projects, ensuring versatility and ease of use for both beginners and experienced sewers.
Optional Attachments for Specialized Sewing
The Singer 2517C offers optional attachments to expand its sewing capabilities. A walking foot is ideal for thick fabrics like denim or leather, ensuring smooth stitching. A quilting guide helps in maintaining even spacing for large projects, while a ruffler foot adds volume to fabric edges. These attachments enhance versatility, allowing users to tackle specialized tasks with precision and ease, making the machine adaptable to various creative sewing needs.
Using the Free Arm for Cuff Sewing
The Singer 2517C’s free arm is a versatile feature designed to simplify sewing hard-to-reach areas, such as cuffs; By detaching the auxiliary bed, users can easily maneuver fabric for precise stitching. This feature is particularly useful for sewing sleeves, pant legs, and other cylindrical items. The free arm provides better control, allowing for smooth, professional-looking results in specialized sewing projects, making it an essential tool for tailored garment construction.

Advanced Sewing Techniques
The Singer 2517C manual guides users in exploring advanced sewing techniques such as precision stitching, intricate embroidery, and custom fabric manipulation, helping to unlock creative potential.
Quilting and Heavy-Duty Sewing
The Singer 2517C manual provides detailed guidance for quilting and heavy-duty sewing, emphasizing the machine’s ability to handle thick fabrics like denim and canvas. It explains how to adjust stitch length and width for heavy-duty projects and recommends using the walking foot or even feed foot for smooth fabric handling. The manual also offers tips for managing multiple fabric layers, ensuring consistent stitching and professional results for quilting and heavy-duty tasks.
Embroidery and Decorative Stitching
The Singer 2517C manual highlights the machine’s capabilities for embroidery and decorative stitching, offering a variety of built-in decorative stitches. It guides users on selecting and customizing stitches for intricate designs. The manual also explains how to use the specialized presser foot for embroidery, ensuring precise fabric control. Tips for stabilizing fabric and adjusting stitch lengths are provided to achieve professional-looking embroidery and decorative patterns effortlessly.
Creating Custom Sewing Projects
The Singer 2517C manual encourages users to explore their creativity by creating custom sewing projects. With its adjustable stitch lengths and widths, the machine allows for personalized touches on garments, home decor, or accessories. The manual provides guidance on mixing stitch patterns and utilizing the built-in needle positions for precise hems and seams. These features empower users to craft unique, professional-quality projects that reflect their individual style and creativity.

Benefits of the Singer 2517C Manual
The Singer 2517C manual offers a comprehensive guide, detailed instructions, troubleshooting tips, and visual diagrams, ensuring users maximize their sewing machine’s potential effectively and efficiently.
Detailed Instructions for Every Function
The Singer 2517C manual provides clear, step-by-step guidance for every function, from basic setup to advanced stitching. Each feature is explained with precision, ensuring users understand how to operate the machine efficiently. Whether threading, selecting stitches, or adjusting settings, the manual covers it all, making it easy for sewers of all skill levels to master the machine’s capabilities without confusion or frustration.
Visual Guides and Diagrams
The Singer 2517C manual includes detailed visual guides and diagrams to help users understand complex functions. These visuals provide clear illustrations of threading, bobbin installation, and stitch selection. Color-coded images and exploded views simplify maintenance tasks, while step-by-step diagrams ensure proper setup and operation. The manual’s visual aids reduce confusion, making it easier for users to master the machine’s features and troubleshoot common issues efficiently.
Troubleshooting Section for Quick Fixes
Troubleshooting Section for Quick Fixes
The Singer 2517C manual includes a dedicated troubleshooting section designed to address common issues quickly. It covers problems like thread breakage, uneven stitching, and machine jams, offering step-by-step solutions. Users can identify symptoms and apply practical fixes without needing professional help. This section ensures minimal downtime, helping sewers resolve issues efficiently and continue their projects seamlessly. It’s a valuable resource for maintaining smooth operation and extending the machine’s lifespan.

Comparing Singer 2517 and 2517C Models
The Singer 2517 and 2517C models share similar functionalities but differ in advanced features. The 2517C offers improved stitching options and enhanced durability, making it a better choice for experienced sewers seeking versatility and reliability in their projects.
Differences in Features and Capabilities
The Singer 2517C model offers enhanced features compared to the 2517, including additional built-in stitch options and improved automatic tension control. It also boasts a more durable construction, making it suitable for heavy-duty projects. The 2517C includes advanced needle threading and a larger sewing space, catering to users who need versatility for complex sewing tasks. These upgrades make the 2517C more versatile and efficient for both beginners and experienced sewers alike.
Upgrades and Improvements in the 2517C
The Singer 2517C features several upgrades, including a more robust motor for smoother operation and a improved automatic needle threader for easier setup. It also includes enhanced LED lighting for better visibility and a more intuitive control panel. Additionally, the 2517C offers a wider range of stitch options and a heavier-duty frame, making it more durable and versatile for various sewing projects compared to its predecessor.
Which Model is Right for You?
Choose the Singer 2517 if you’re a casual sewer needing basic functionality. Opt for the 2517C if you want advanced features like additional stitch options, an automatic needle threader, and enhanced LED lighting. Consider your sewing frequency, budget, and project complexity. The 2517C is ideal for those seeking versatility and efficiency, while the 2517 suits simpler, occasional sewing needs.

Frequently Asked Questions
Frequently Asked Questions provide quick solutions to common issues, helping users troubleshoot and maintain their Singer 2517C effectively. Explore general inquiries and expert tips for optimal performance.
Common Queries About the Singer 2517C
Users often ask about thread tension adjustment, bobbin installation, and troubleshooting error messages. They also inquire about compatible accessories and how to use specific stitch patterns. Additionally, questions arise about maintenance routines, oiling the machine, and resolving common sewing issues like uneven stitches or fabric dragging. These queries highlight the need for clear guidance to ensure smooth operation and optimal performance of the Singer 2517C sewing machine.
- Thread tension and adjustment tips.
- Bobbin installation and threading issues.
- Understanding error messages and solutions.
- Compatible presser feet and accessories.
- Maintenance and lubrication routines.
User-Generated Questions and Answers
Users often share tips on optimizing stitch quality and troubleshooting common issues. Many discuss their experiences with the free-arm feature for sewing cuffs and sleeves. Some inquire about using the machine for quilting or heavy-duty fabrics. Others ask about the best materials for beginners or how to customize stitch lengths. These discussions provide practical insights and solutions from real users, enhancing the sewing experience with the Singer 2517C.
- Tips for using the free-arm feature effectively.
- Quilting and heavy-duty sewing advice.
- Customizing stitch settings for specific fabrics.
- Troubleshooting common operational issues.
Tips from Experienced Users
Experienced sewists recommend regular machine cleaning and lubrication for smooth operation. Using the correct presser foot for specific fabrics ensures better stitch quality. They also suggest experimenting with stitch lengths and widths for custom results. Many advise keeping a spare bobbin and regularly checking thread tension to prevent fabric puckering. These tips enhance productivity and help users achieve professional-looking stitches consistently.
- Regular maintenance for optimal performance.
- Using the right presser foot for fabric types.
- Experimenting with stitch settings for customization.
- Checking thread tension to avoid puckering.
Final Thoughts on the Singer 2517C Manual
Congratulations! You’ve mastered the Singer 2517C sewing machine. This comprehensive guide has covered everything from setup to advanced techniques. Now, explore creative sewing projects with confidence and inspiration.
The Singer 2517C manual is an essential resource for both beginners and experienced sewists, offering detailed guidance for optimal use of the machine. It covers setup, operation, and maintenance, ensuring users can harness the machine’s full potential. With clear instructions and troubleshooting tips, the manual empowers creativity and confidence in sewing projects. Whether crafting garments, quilts, or home decor, the Singer 2517C manual is your key to unlocking endless sewing possibilities;
Encouragement to Explore Creative Sewing Projects
With the Singer 2517C manual as your guide, you’re empowered to explore a world of creative sewing projects. From crafting custom clothing to designing home decor, the machine’s versatile features and stitch options inspire endless possibilities. Experiment with quilting, embroidery, or upcycling to bring your unique ideas to life. Let the Singer 2517C manual motivate you to push your sewing skills and create something truly special with every stitch.